☰ Menu
☰
✨

Y9 - SU1.5 - Refining a Website

⏱️ Do It Now

Create a OneNote Page and copy this into the title:

Lesson 5 - Summer 1 - Refining A Website


Copy this into a OneNote Page and complete it

πŸ“ Do It Now

Answer each of the following:

(1) What does this CSS do?

p{
color: red;
}


(2) This is some CSS code applied to a navigation menu. What does each of these properties control?

.nav{
background-color:#00ff00;
padding:5px;
}


(3) Explain what this tag is used for?
πŸ”ΊWhat does href do?
πŸ”ΊWhy do we use the letter a?
<a href="seagull-facts.html"> Seagull Facts </a>


Extension Question: What is the most important thing to consider when building a website, and why is it the most important?


🎯 Learning Objectives


  • LO1: We will be able to edit and format HTML Webpages
  • LO2: We will be able to link multiple pages together, with a consistent navigation menu
  • LO3: We will be able to test the functionality of a website

Success Criteria

You must produce a website where:

  • There are at least 4 pages
  • All pages are linked to one another
  • There are images on each page
  • There is good balance of images and text on each page
  • CSS has been used in order to enhance the site


Example

What Happens if Something Goes Wrong?

There are several reasons why your pages might not display or behave strangely

(1) The <!DOCTYPE html> is missing from the top

This will often cause the page not to display


<!DOCTYPE>
  <html>
     <head>


(2) A HTML tag hasn't been closed properly

Even worse, you started work on a tag and left it half finished


<p> So here is a paragraph of text but I forgot a closing tag
  
<h1>This heading may not work because the previous paragraph hasn't been closed</h1>


(3) The stylesheet hasn't been linked to the page

It needs to be done via a link tag in the head / head section


<head> 
<link rel="stylesheet" href="styles.css" />


(4) Semi-colons have been left off the end of each line of CSS

If you don't put a semi-colon after each style rule the computer won't change the current property

In the example below you can see that a semi-colon has been left off the end of the font-family property.


h1{
    background-color: indigo;
    font-family:arial
    text-size: 42;

}

πŸ“– HTML Tags

The tags below are each used on a webpage

Expand each block in order to see the code


Headings

Headings come in 6 different varieties (h1 being the biggest, h6 being the smallest)

Click for examples of headings
Heading 1 (largest)
----------
<h1>Content goes here</h1>


Heading 2 (second largest)
----------
<h2>Content goes here</h2>


Heading 6 (smallest)
----------
<h6>Content goes here</h6>


Paragraphs

Paragraphs come in one size and are controled by the p tag

Click for examples of paragraphs

<p>Paragraph text goes here</p>

<p>Text for another paragraph goes here</p>


Images

Images only have a single tag (no closing tag)

  • The src attribute is the location of the image (should be your images folder)
  • The width attribute can be given in pixels (px) or as a percentage of the overall page width
Click for an examples of an image tag

<img src="images/imagename.png" width="200px" >


Hyperlinks (Anchor Tags)

The anchor tag is used to create a hyperlink (from one webpage to another).

  • The href attribute is the location of the webpage the link will take you to.
  • Sometimes we use the target attribute to specify the page will open in a new tab (we call this _blank)
Click for an examples of an anchor tag

<a href="somepage.html" target="_blank">Text for the user to click on</a>


Bullet Point List

We can make bullet point lists with the unordered list element

  • The whole list needs to be between the opening ul and closing ul element
  • Each item of the list must begin and end with li and /li
Click for an example of a bullet point list

<ul>
<li>Bullet point item 1</li>
<li>Bullet point item 2</li>
<li>Bullet point item 3</li>
</ul>


Lines between each part (horizontal rule)

Horizontal rules (lines) like the one above can be added with the hr tag

Click for an example of a horizontal rule

<hr>


New lines

The br (line break) tag can be used to add a new line of text below

They are especially useful for breaking up lines of text in a paragraph

Click for an examples of a line break

<p>
Tony Stark is the head of Stark Industries and also Iron Man <br>

Natasha Romanova(AKA Black Widow) is a trained spy and assassin who grew up in a secret sleeper cell.
</p>


CSS

These are added to your stylesheet (styles.css)

There are more examples of CSS on the next few slides

The code below: 
πŸ”»Sets the text colour of heading 1 tags to green
πŸ”»Sets the font to Gill Sans, however if this font isn't on the computer viewing the webpage it will set it to Gill Sans MT.

h1{
    color:green;
    font-family:'Gill Sans', 'Gill Sans MT';
}

This can be done exactly the same for h2 and p tags


The code below: πŸ”»Sets the background colour of the page to the hex value #00ff00 body{ background-color:#00ff00; }
The code below: πŸ”»Uses the border-radius property to round the corners of the image. πŸ”»Uses the border property to add a 5 pixel thick, solid red border to all images img{ border-radius:10px; border: 5px solid #ff0000; }

Adding CSS To Just One Tag

You have made a stylesheet that controls the way certain elements look on each page.

This is all good, but what if you wanted one particular element (lets say a heading) to be a different colour from the other headings?

We can do this with an inline style


Simple, just changing the colour
--------------------------------------------------
<h1 style="color:purple;">Text for the heading</h1>


Changing several properties
--------------------------------------------------
<h1 style="color:red; font-family:arial; font-size:32px;">Text for the heading</h1>

Doing this will only affect that particular element.

πŸŽ₯ Create Multiple Pages

Work with the video below to set up multiple pages on your site.

You don't need to complete all of them immediately but you do need them for the navigation menu to work.

VSCODE - MAKE MULTIPLE PAGES

Click for page template code
<!DOCTYPE html>

<html>
    <head>
        <title>My Website</title>
        <link rel="stylesheet" href="styles.css" />
        <link rel="icon" href="favicon.ico" type="image/x-icon" />
        <script type="text/javascript" src="script.js"></script>
    </head>

    <body>
 
<!-- Content Goes here! -->
    
    </body>
</html>

Go to next slide ➑️➑️

πŸŽ₯ Publishing and Viewing Your Site

Work with the video below to publish your website so you can view it live.

This will also allow you to test if any links work.

VSCODE - PUBLISHING AND VIEWING YOUR WEBSITE


Go to next slide ➑️➑️

πŸŽ₯ (1) Create A Navigation Menu

Work with the video below to create a navigation menu on your site.

For this to work you must have created all of the pages first.
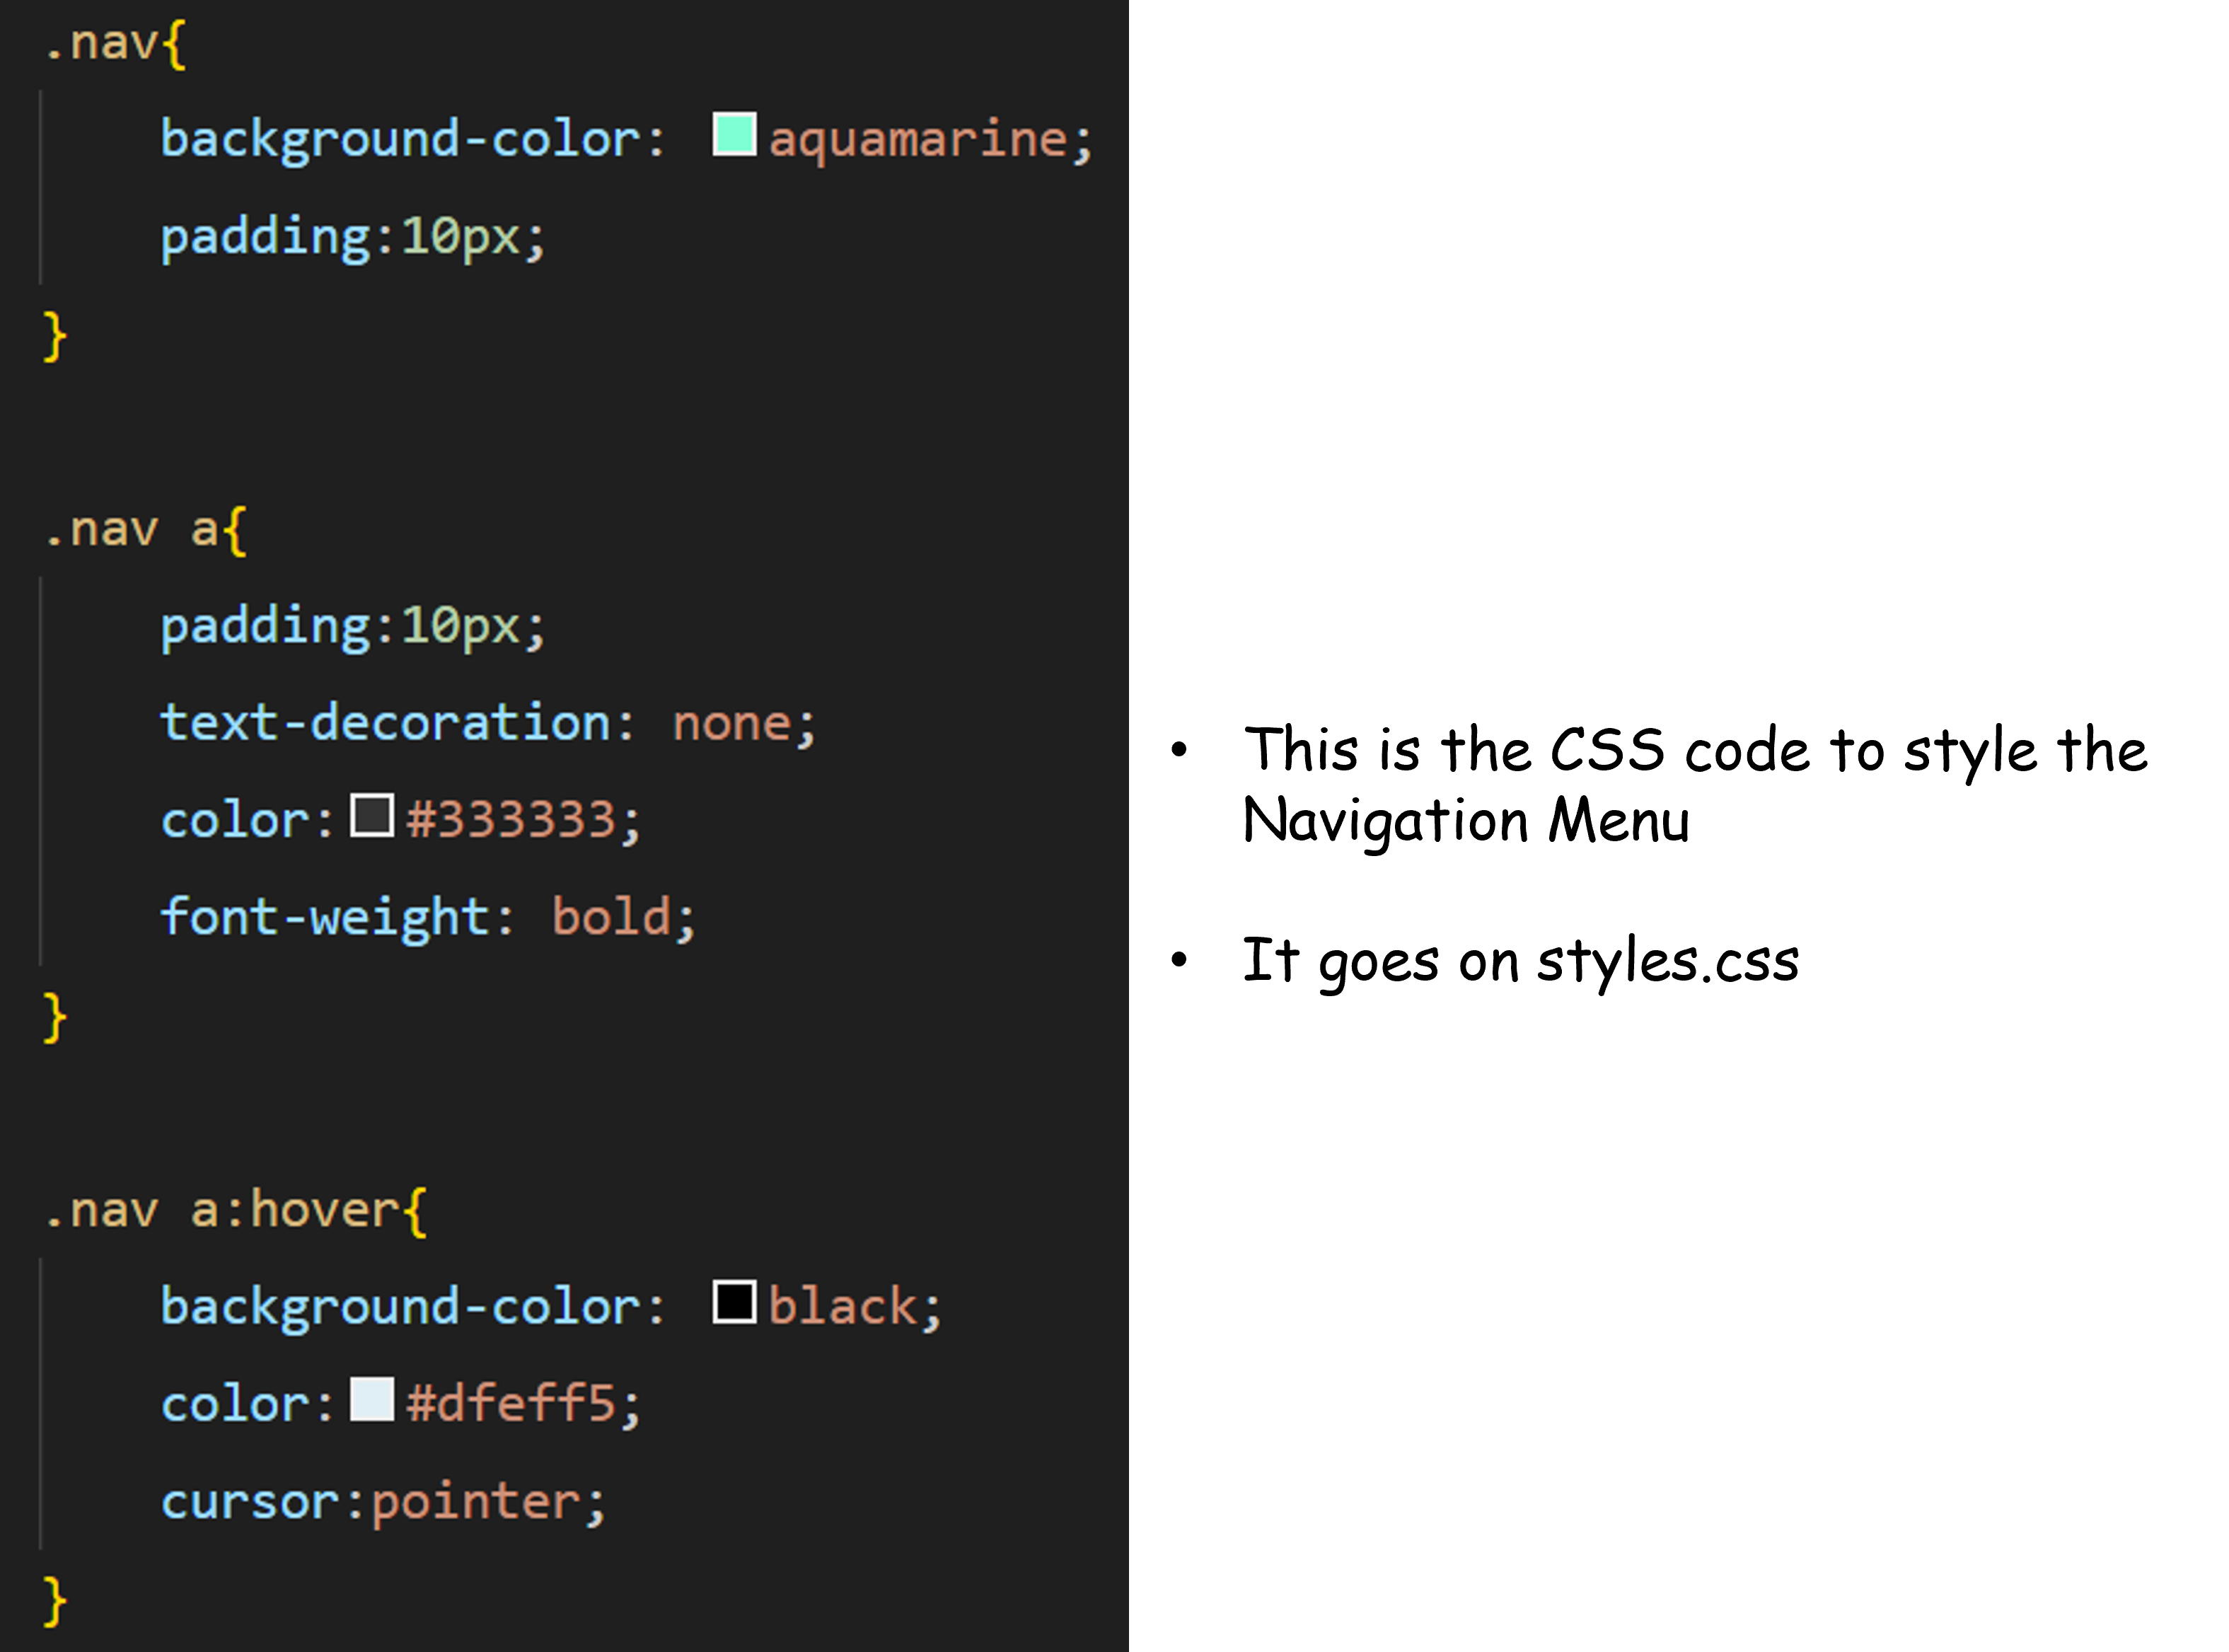
VSCODE - MAKE A NAVIGATION MENU


πŸŽ₯ (2) Style Your Navigation Menu

Work with the video below to style the navigation menu on your site.

VSCODE - STYLING A NAVIGATION MENU


Go to next slide ➑️➑️

πŸŽ₯ Adding Images From Google To A Site

Watch This video to see how an image from Google can be added to your webpage


Go to next slide ➑️➑️

πŸŽ₯ Creating a Website Banner With PowerPoint

Watch This video to learn how to create a website banner


Go to next slide ➑️➑️

πŸ‘©β€πŸŽ¨ Image Border and Rounded Edges

You can add borders and rounded edges to images.


Use this code for an image tag


<img src="images/button-moon.png"
style=
"
width:200px;
border:8px solid red;
border-radius:100px;
"
>

The style attribute is basically CSS but you can add it inside the image tag instead of on the stylesheet.


Go to next slide ➑️➑️

πŸ‘©β€πŸŽ¨ Creating A Flex Box

Any element placed within a flex box will appear next to, not below the previous element


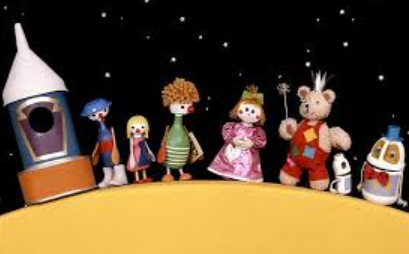
Button moon was a popular children's television series during the mid 1980s. It featured a whole host of characters on the moon!


The code for this


<div style="
display:flex;
width:66%;
border:5px solid blue;
padding:5px;
background-color:grey;
border-radius:20px;
">

<!-- Put your content here -->

</div>